Step by step instructions on configuring a Thunderbird email client on Linux
To configure Thunderbird on a Linux system to access email from SDCC email servers, follow these instructions.
First, start-up Thunderbird. If you have never used Thunderbird before, the "Account Wizard" window will pop up. If you are currently using Thunderbird for other email accounts, you will need to start up Thunderbird and start up the "Account Wizard". This can be done by selecting "Edit" > "Account Settings" from the top menu bar and clicking on the "Add Account" button in the "Account Settings" window.
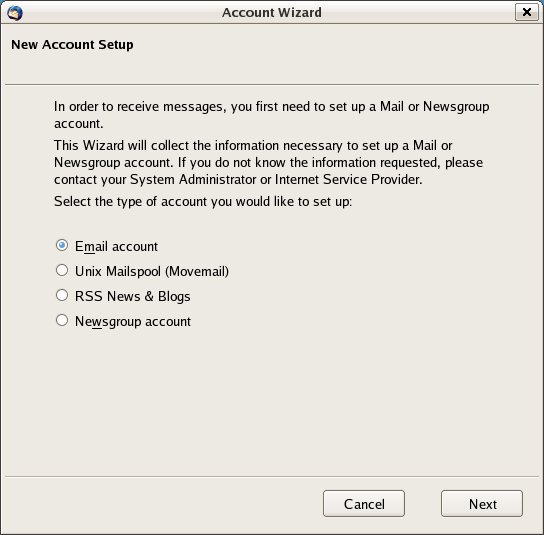
Make sure that the type of account to be set up is an "Email account", then click on "Next" to get to the "Identity" window.
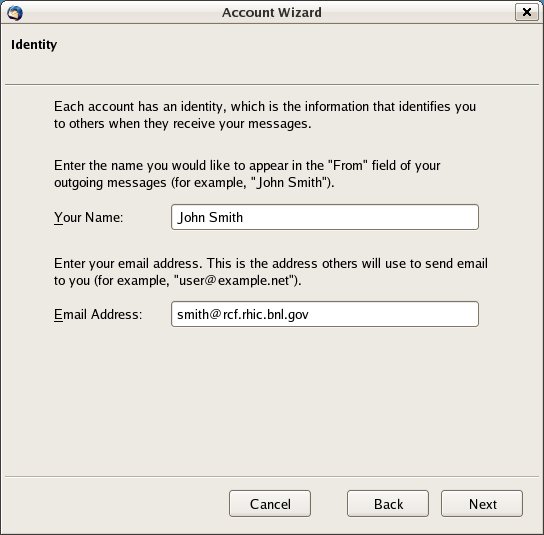
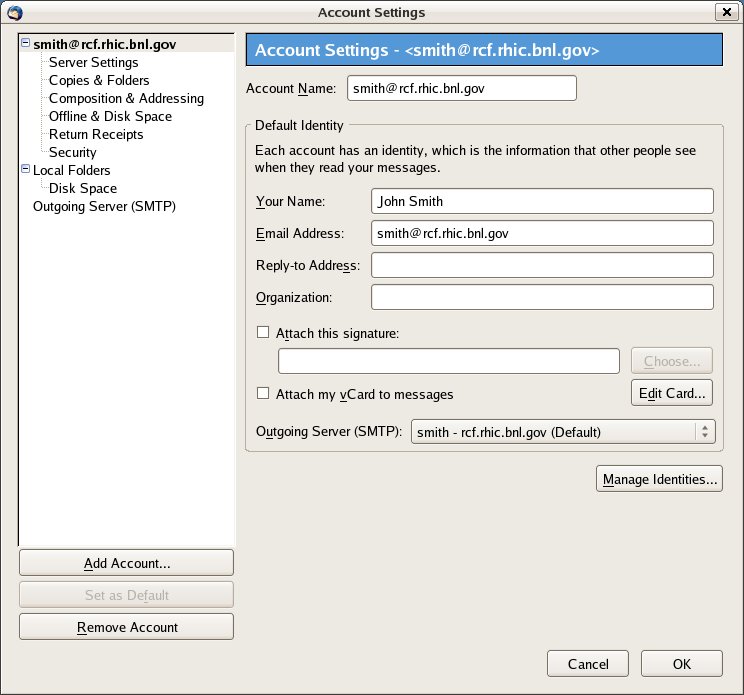
In the "Identity" window, enter your full name in the "Your Name" field, and your email address in the "Email Address" field. For RHIC/LSST users, your email address on the server is username@rcf.rhic.bnl.gov. For US ATLAS users, your email address on the server is username@mail.usatlas.bnl.gov. In both cases, username is the username you have been assigned on the SDCC system. Click "Next" to bring up the "Server Information" window.
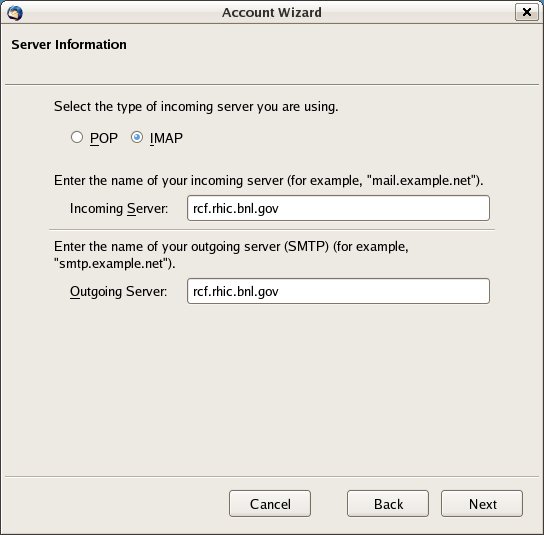
In the "Server Information" window, select "IMAP" for the server type. For RHIC/LSST users, enter "rcf.rhic.bnl.gov" for the "Incoming" and "Outgoing" server names. Then click on the "Next" button to get to the "User Names" window.
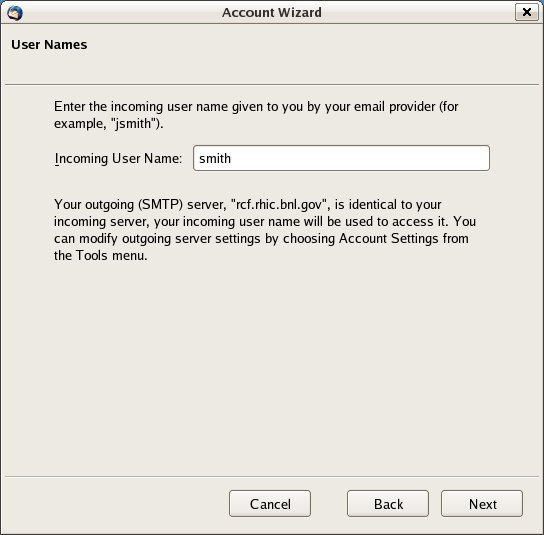
In the "User Names" window, enter your username in the "Incoming User Name" field. Again, this is your UNIX username on the SDCC system. Click on "Next" to get the "Account Name" window.
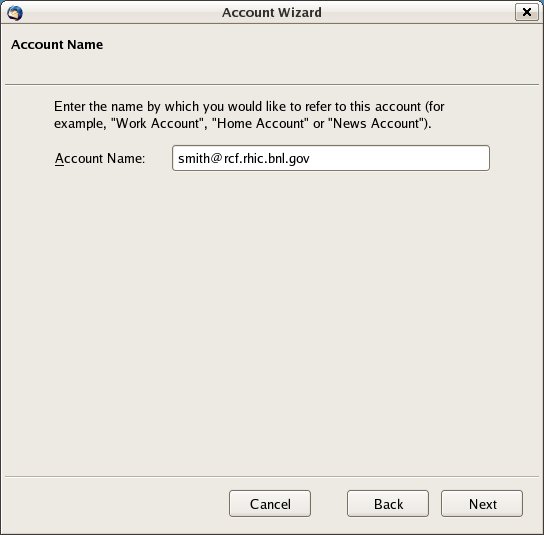
In the "Account Name" window, enter a name that will uniquely identify the account to Thunderbird (In this case we have chosen the
email address for the account.) Click on "Next" to get to the acknowledgement window.
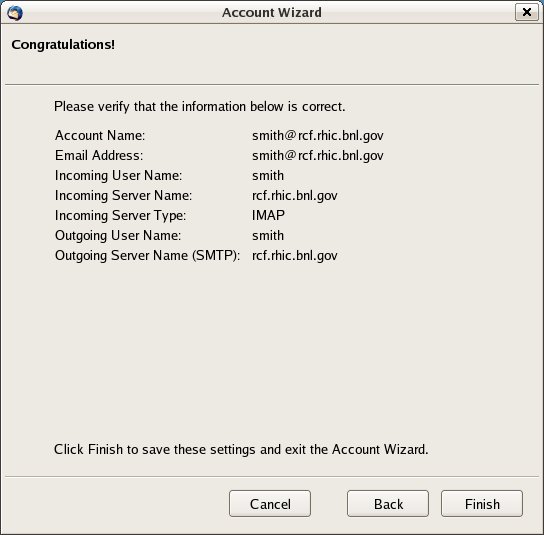
Despite what the window says, additional configuration is necessary. Click on "Finish" to continue with the configuration of Thunderbird. Bring up the "Account Settings" window by selecting "Edit" > "Account Settings" from the main menu bar.
Select "Server Settings" for the account that was just configured. This will bring up the "Server Settings" window.
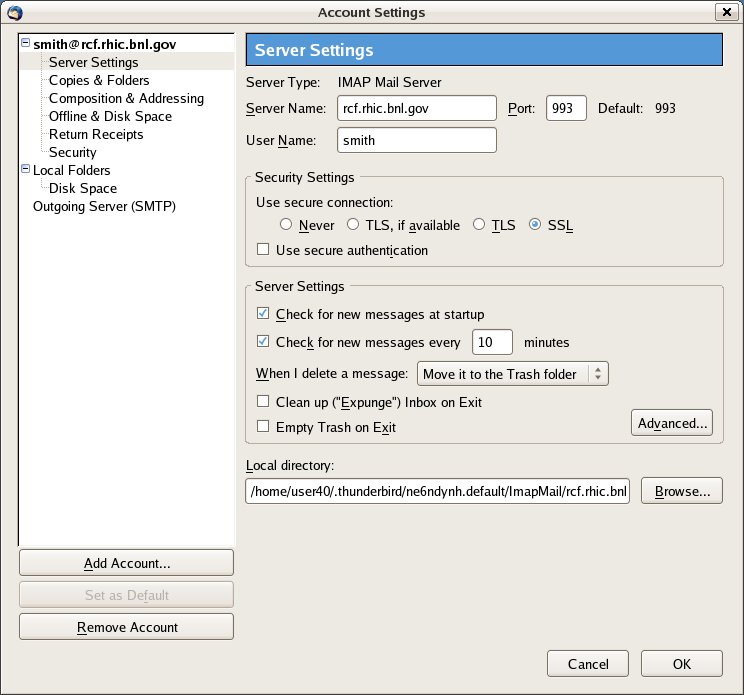
In the "Security Settings" box in the "Server Settings" window, select the "SSL" option for the "use secure connections" setting. Verify that the "Port" field has changed to 993. Next, click on the "Advanced" button in the "Server Settings" box to bring up the "Advanced Account Settings" window.
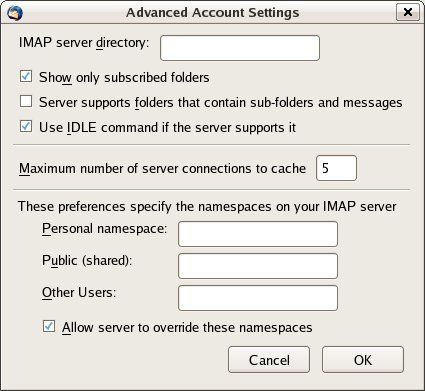
In the "Advanced Account Settings" window, verify that the "Server supports folders that contain sub-folders and messages" is NOT selected. Click on "OK" to commit the change. Back in the "Server Settings" window, click on "OK" to commit the changes to the server "Port" and "SSL" configuration.
Next, bring up the "Account Settings" window again ("Edit" > "Account Settings"). Select "Outgoing Server" to bring up the "Outgoing Server Settings" window.
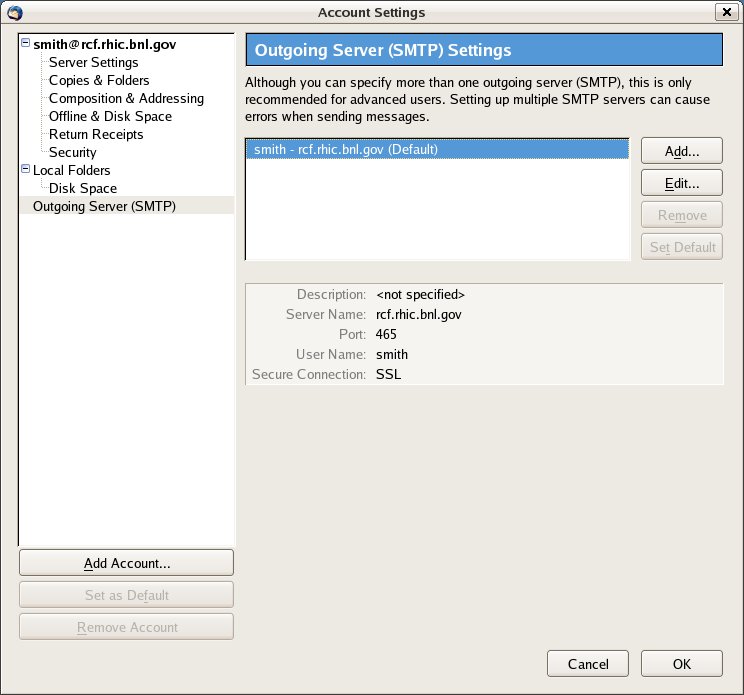
Select the SMTP server that as configured in the previous steps and click on the "Edit" button. This will bring up the "SMTP Server" window.
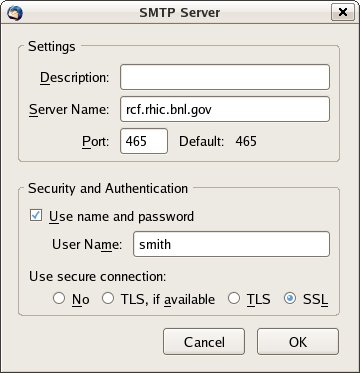
In the "SMTP Server" window, select "Use name and password" and enter in your username in the "User Name" field. Select the "SSL" option for "Use secure connection". Click on "OK" to return to the "Outgoing Server Settings" window.
Finally, click on "OK" in the "Outgoing Server Settings" window to commit the changes to the SMTP server configuration. At this point, Thunderbird is configured to read and send email through rcf.rhic.bnl.gov or mail.usatlas.bnl.gov systems. Note that when you first retrieve mail and when you first send email, you will be prompted for your email password. If you wish, you can have Thunderbird remember the incoming and outgoing passwords. For RHIC/LSST users the password to use is the dedicated email password. For US Atlas users, the password to use is your Kerberos password.