Release 8.0.4 for Windows NT and Windows 95
A55922-01

Library |

Product |

Contents |

Index |
| Oracle8
Client Getting Started
Release 8.0.4 for Windows NT and Windows 95 A55922-01 |
|


This chapter describes post-installation configuration tasks
for Oracle8 Client.
Specific topics discussed are:
Review the table below and the sections/documents referenced to identify the configuration responsibilities for your products.
| Product | Is Configuration Automatic? | See the Following for Instructions... |
|---|---|---|
|
Net8 network software |
For server configuration files, configuration is usually automatic. For client configuration files, configuration must typically be manually performed (unless you use the Host Adapter). |
"Net8" of this chapter |
|
Oracle Enterprise Manager |
No. |
"Oracle Enterprise Manager" of this chapter |
|
Oracle8 ConText Workbench |
Depends upon how product was installed and whether you are upgrading or migrating from a previous release. |
"Oracle8 ConText Cartridge Workbench" of this chapter |
Net8 is the Oracle network software that enables applications
running on Windows NT and Windows 95 client workstations to access, modify,
share, and store data on Oracle8 databases. An easy-to-use network configuration
tool, Oracle Net8 Easy Config, enables you to configure Windows NT and
Windows 95 clients to communicate with Oracle8 databases. Use Oracle Net8
Easy Config to create and modify server and client configuration files.
See Chapter 2, "Introducing Oracle8 Client"
for information on how this product is installed. See also Net8 Getting
Started for Windows NT and Windows 95 for instructions on using Oracle
Net8 Easy Config.
Before describing how to configure Oracle Enterprise Manager,
the key components are briefly described.
Oracle Enterprise Manager works with Oracle Intelligent Agent
(installed in the Oracle8 database to be managed) to perform remote database
management from a single console computer. Oracle Enterprise Manager is
installed on a console computer, a Windows NT or Windows 95 client.
Oracle Intelligent Agent runs on the Oracle8 database to be managed. This Oracle8 database is the one you use for your production work. Oracle Intelligent Agent manages and completes tasks on the Oracle8 database that are requested from the Oracle Enterprise Manager Console computer. Oracle Intelligent Agent:
The Oracle Enterprise Manager Console uses an Oracle8 database as a repository for storing key configuration information. The Oracle8 repository database can be installed on:
The sole responsibility of the repository database is to act as the Oracle Enterprise Manager's storage resource. The Oracle8 repository database is:
Do not create a repository and a production database
in the same Oracle8 database. If you do, you will not be able to perform
many database administration tasks, such as starting or shutting down the
database.
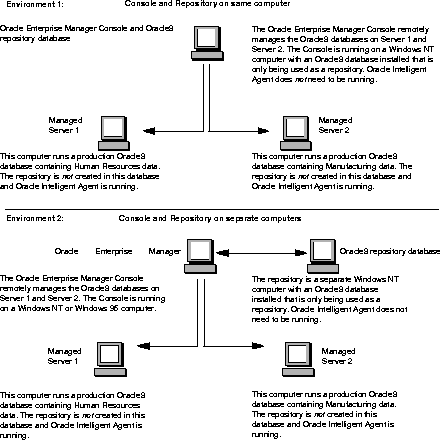
Set up your Oracle Enterprise Manager Console, managed Oracle8 database(s), and Oracle8 repository environment in either of two ways:
Oracle Enterprise Manager setup involves configuring the computers on which your Oracle Enterprise Manager, managed Oracle8 database(s), and Oracle8 repository database are installed. This table describes the tasks that must be performed to configure the two Oracle Enterprise Manager environments illustrated previously and the computers on which to perform these tasks. Each task is then fully described in the sections that follow. Use this table as a reference as you perform your configuration tasks.
| Perform This Task... | On Managed Oracle8 databases? | If Console and Repository are on same computer? | If Console and Repository are on separate computers? |
|---|---|---|---|
|
Yes |
No |
No |
|
|
No |
|
Yes, but only perform this task on the computer on which you create the repository |
|
|
Step 3: Create a Windows NT User Account on Managed Oracle8 Database Server |
Yes |
No |
No |
|
No |
No |
Yes |
|
|
No |
Yes |
Yes, but only perform this task on the computer on which you create the repository |
Ensure that the Oracle8 database services OracleServiceSID,
OracleTNSListener80 (or OracleHOME_NAMETNSListener80 if using an
Oracle home directory with a home name), and OracleAgent are started. Oracle
Intelligent Agent automatically locates the services on the computer where
it resides and passes this information to the Oracle Enterprise Manager
Console.
To start Oracle Services:
C:\> NET START SERVICE_NAME
You need to have a user account with database administrator
(DBA) privileges set up on the Oracle8 repository database. Oracle Enterprise
Manager places the repository in the default tablespace of the user account
to which you are connected when creating the repository. Because of this,
Oracle Corporation recommends that you create a new user account so that
the repository can be created in its own tablespace. It is also recommended
that you create a new tablespace and the newly-created user be customized
to use this tablespace as their default tablespace.
To create a repository user account on the Oracle8 repository database:
C:\> SVRMGR30
SVRMGR> CONNECT SYSTEM/PASSWORD
where PASSWORD is MANAGER for the SYSTEM user account by default. If you have changed this password, substitute MANAGER with the correct password.
SVRMGR> CREATE TABLESPACE REPOSIT_TABLESPACE DATAFILE
'ORACLE_HOME\DATABASE\DATAFILE' SIZE XM;
where:
SVRMGR> CREATE USER USERNAME IDENTIFIED BY PASSWORD DEFAULT TABLESPACE
REPOSIT_TABLESPACE;
SVRMGR> GRANT DBA TO USERNAME IDENTIFIED BY PASSWORD;
SVRMGR> EXIT
Exiting Server Manager closes the database connection.
After a repository user account is created, an NT user account
must be created on the managed Oracle8 database server.
To create a user account on the managed Oracle8 database server:
The User Manager window appears:
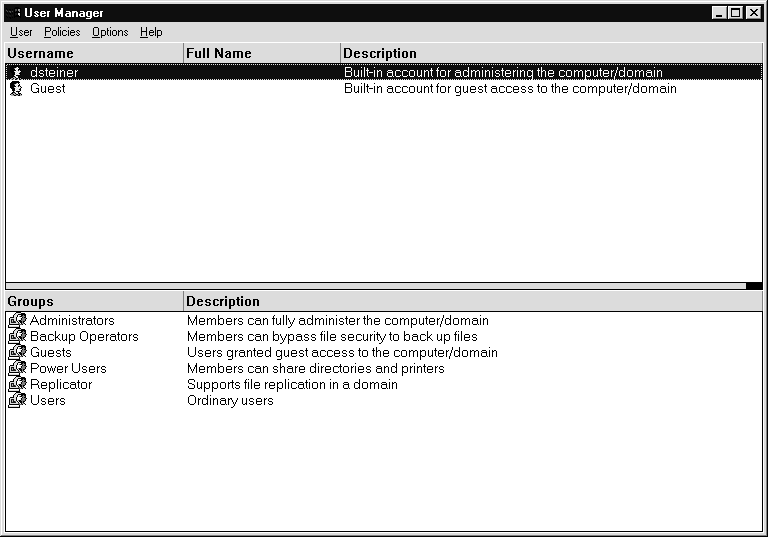
The New User dialog box appears:
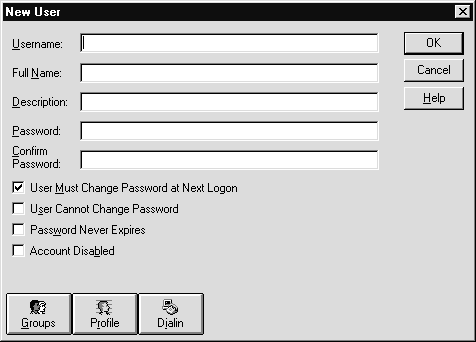
The user name and password that you enter here do not need to match those that you created in "Step 2: Create a Repository User Account".
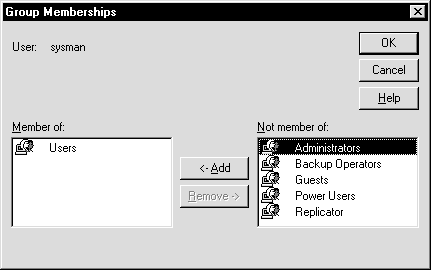
The Group Memberships dialog box appears:
Administrators is added to the Member of list box.
The user is added and the User Manager window reappears.
The User Rights Policy dialog box appears:
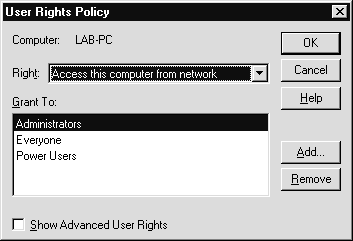
If Users does not exist, create it:
The Add Users and Groups dialog box appears:
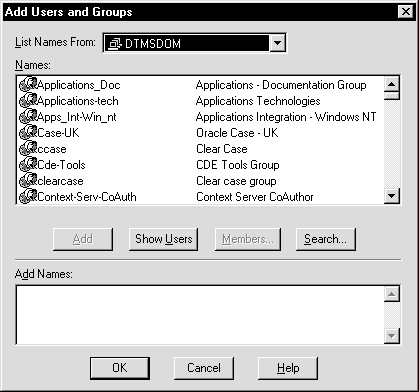
Users appears in the Grant To list box.
The User Manager window reappears.
If Oracle Enterprise Manager is installed on the same computer
as the repository database, you do not need to configure your network.
If Oracle Enterprise Manager is installed on a Windows 95 or Windows NT
client console separate from the computer on which the repository database
is installed, you must configure the client computer so it can connect
to the Oracle8 repository database:
To create network configuration files:
Before you can use Oracle Enterprise Manager, you need a
repository on the console workstation where Oracle Enterprise Manager will
run. The repository is a set of base tables in a database that contains
status and environment information for your managed databases. A separate
repository must be created for each user wanting to use Oracle Enterprise
Manager.
The Oracle Enterprise Manager Console workstation must also
discover network services, such as databases, listeners, and nodes, to
populate the Oracle Enterprise Manager Navigator tree. In addition to discovery,
Oracle Enterprise Manager must also be able to manage these services for
the Job Scheduling and Event Management systems. This can be achieved with
the Discovery Wizard.
When the agent starts up and is explicitly requested by the
Oracle Enterprise Manager with the Navigator Discovery feature, the agent
passes information from the Oracle Enterprise Manager Console to populate
the Navigator tree.
To create a repository:
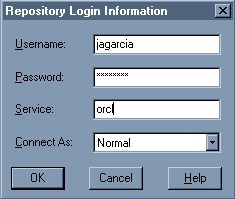
The Oracle Enterprise Manager Repository Login Information dialog box appears:
The Oracle Repository Manager window appears, prompting
you to build the repository:
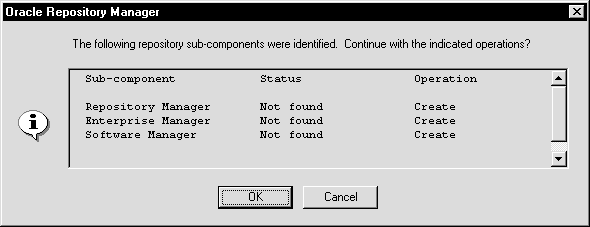
The repository is built. A dialog box asking if you want a quick tour of Oracle Enterprise Manger appears.
The Discover New Services Wizard appears:
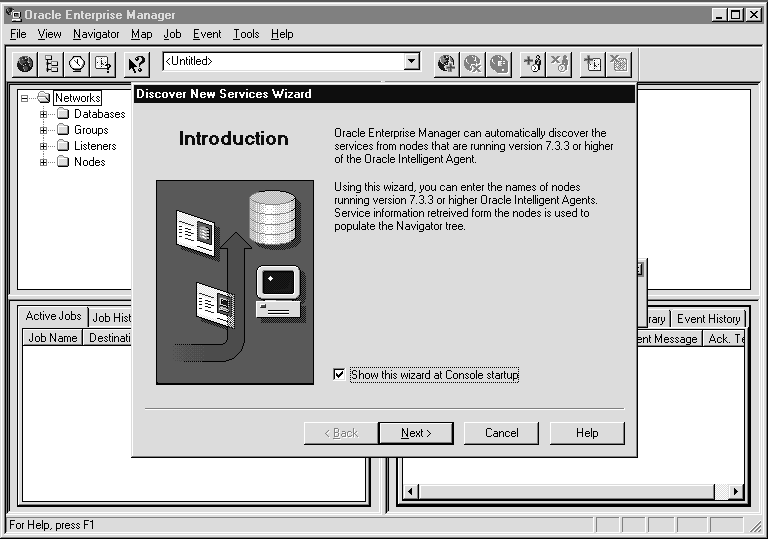
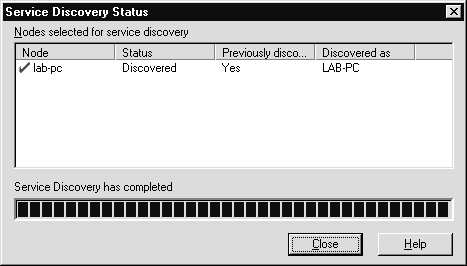
Services are discovered when you see the dialog box below with a status of Discovered:
If the services are not discovered, click Help for troubleshooting hints. The wizard can be restarted by selecting Service Discovery under Navigator in the main menu.
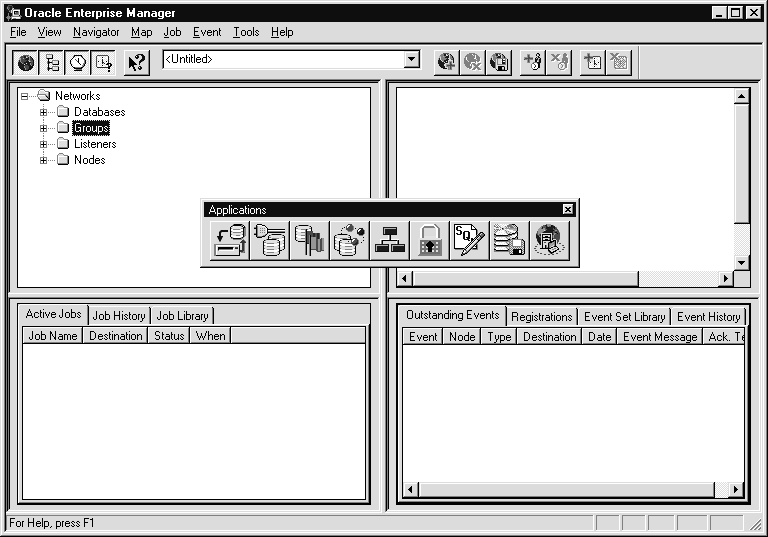
The Oracle Enterprise Manager Console appears:
Configuration is complete. Oracle Enterprise Manager is now available for use.
Oracle8 ConText Cartridge Workbench consists of administrative tools and application development tools. Specific topics discussed in this section are:
To upgrade from previous releases of Workbench, install the
current release of Oracle8 ConText Cartridge Workbench in the same Oracle
home directory as the previous release using Oracle Installer. Oracle Installer
automatically upgrades all Workbench files to the current release.
Configuring Oracle8 ConText Cartridge Viewer Cartridge
To configure Oracle8 ConText Cartridge Workbench:
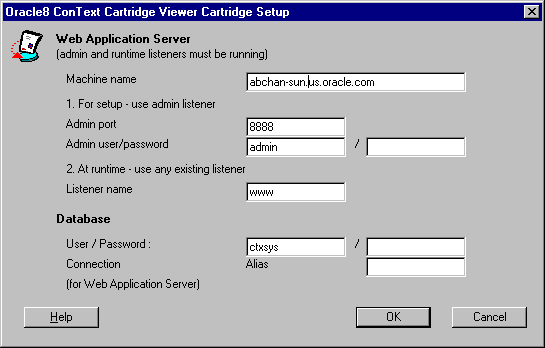
Oracle Installer starts, and the Oracle8 ConText Cartridge Viewer Cartridge Setup dialog box appears:
| Field1 | Description |
|---|---|
|
Machine name |
Enter the machine name of the WebServer or Web Application Server. |
|
Admin listener port |
Enter the admin listener port of the WebServer or Web Application Server. |
|
Admin listener user and password |
Enter the admin listener user and password. |
|
Listener name |
Enter an existing listener name. |
|
User/Password |
Enter the CTXSYS user and password. The default password is CTXSYS. |
|
Connection alias |
Enter the database alias for the WebServer or Web Application Server to the Oracle8 database. Note: The alias that you enter here is not the alias that connects the client to the Oracle database. |
| 1 Ask your web server administrator for assistance with these values. |
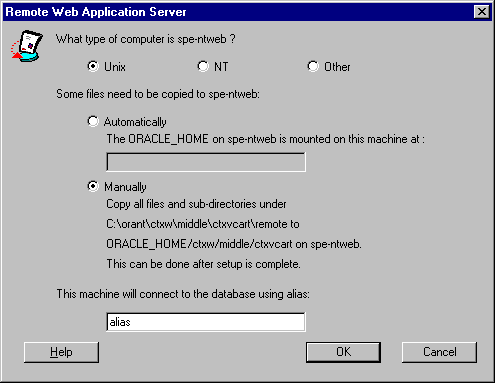
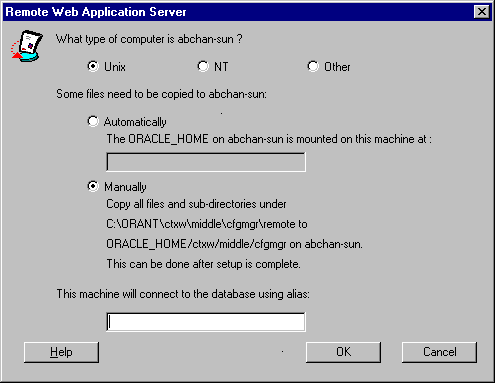
If your web server is on the same computer as the Viewer Cartridge, then go to Step 5. Otherwise, the Remote Web Application Server dialog box appears.
You can only select Automatically if the web server and Configuration Manager are installed on the same computer.
Enter the database alias of the client computer to the Oracle8 database. Also, note the directory information so that you can copy the files after the configuration process.
Oracle Installer begins installing Viewer Cartridge files.
This process may take several minutes.
After installation is complete, an information message appears with important post-installation instructions.
To configure Oracle8 ConText Cartridge Configuration Manager:
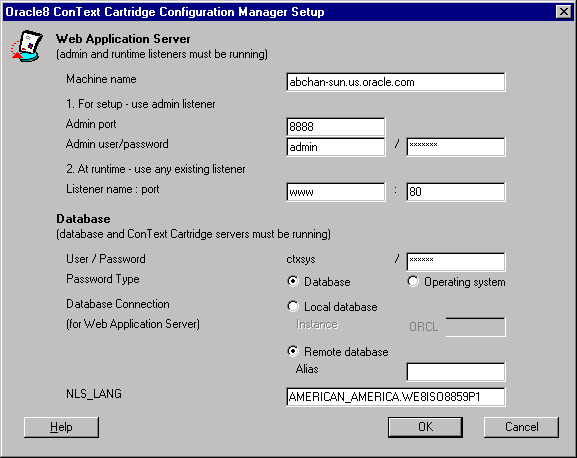
Oracle Installer starts, and the Oracle8 ConText Cartridge Configuration Manager Setup dialog box appears:
| Field1 | Description |
|---|---|
|
Machine name |
Enter the machine name of the WebServer or Web Application Server. |
|
Admin listener port |
Enter the admin listener port of the WebServer or Web Application Server. |
|
Admin listener user and password |
Enter the admin listener user and password. |
|
Listener name and port |
Enter an existing listener name and port number. |
|
User/Password |
Enter the CTXSYS user and password. The default password is CTXSYS. |
|
Connection alias |
Enter the database alias for the WebServer or Web Application Server to the Oracle8 database. The alias that you enter here is not the alias that connects the client to the Oracle database. |
| 1 Ask your web server administrator for assistance with these values. |
If your web server is on the same computer as the Configuration Manager, then go to Step 5. Otherwise, the Remote Web Application Server dialog box appears:
You can only select Automatically if the web server and Configuration Manager are installed on the same computer.
Enter the database alias of the client computer to the Oracle8 database. Also, note the directory information so that you can copy the files after the configuration process.
Oracle Installer begins installing Configuration Manager
files. This process may take several minutes.
After installation is complete, an information message appears with important post-installation instructions.
This section provides instructions for performing the initial
set up required to use the Oracle8 ConText Cartridge Workbench sample,
CTXFORM.
To set up the CTXFORM demo:
The CTXDEMO user is provided with the Oracle8 ConText Cartridge.
The CTXDEMO user has all of the required privileges to set up and use the
demos. The initial password is CTXDEMO.
If you want to create a user, note that in addition to the
standard privileges required for an Oracle user, the demo user must have
CREATE privileges for the tables and views used in the demos. Also, the
demo user must be assigned the CTXAPP role.
To create a demo user:
| Start SQL*Plus... | By Doing This... |
|---|---|
|
From the MS-DOS command line |
|
|
From the Taskbar |
Choose Start > Programs > Oracle for Windows NT - [HOME_NAME] > SQL*Plus 8.0 |
SQL> CONNECT CTXSYS/PASSWORD
SQL> GRANT CONNECT, RESOURCE TO MYDEMO IDENTIFIED BY MYDEMO;
SQL> GRANT CTXAPP TO MYDEMO;
where MYDEMO is the newly created user.
ORACLE_HOME\CTX80\DEMO\INSTALL> IMP80 CTXSYS/PASSWORD FILE=DEMO.DMP
IGNORE=Y TABLES=ARTICLES
Importing the DEMO.DMP file:
The DEMO.DMP file was originally exported for CTXDEMO. If you specified a user name other than CTXDEMO for your demonstration user, you must include the following parameters when running the Oracle Import utility:
For example:
IMP80 SYSTEM/PASSWORD FILE=DEMO.DMP FROMUSER=CTXDEMO TOUSER=MYDEMO
TABLES=ARTICLES
In the example above, a user named SYSTEM imports the ARTICLES table from the DEMO.DMP file created by CTXDEMO into the schema for a user named MYDEMO.
C:\ORACLE_HOME\CTX80\DEMO\INSTALL> CTXSRV80 -USER CTXSYS/CTXSYS -
PERSONALITY DDL
SQL> @DEMOINST.SQL
This script serves as an example of the tasks that you must
perform to set up your tables for processing text queries using Oracle8
ConText Cartridge.
The script creates the policies, preferences, views, and results tables used by the demos and creates a text index for the ARTICLES table.