Last updated by Carla M. Vale, 29 Mar 2000 16:33:18
The Si Monitor is running on a computer labeled as "Silicon Slow Monitoring". The user should log in as "stringtester", the corresponding password is part of the shift passwords list.
To open the current version of the Si Monitor, double-click the shortcut in the middle of the screen. Labview should load all the necessary components in a few seconds.
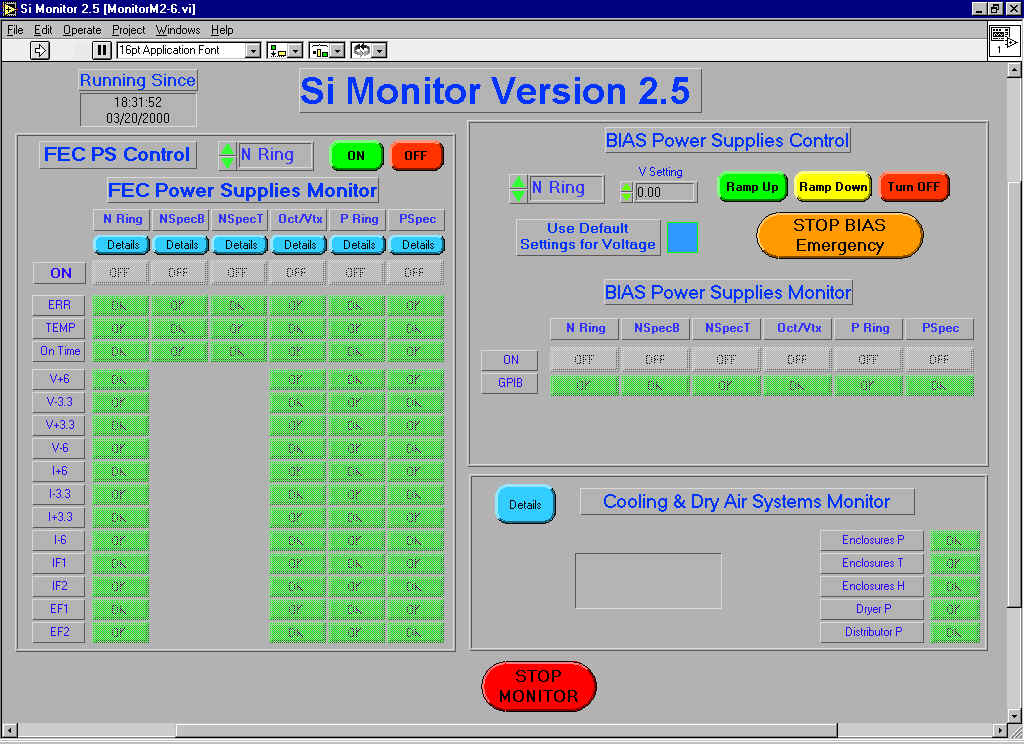
Then, the window should look similar to this:
To start running the Si Monitor click the white arrow in the upper left corner. Some lights will blink, as the first readouts from different parts of the system are taken. The controls should not be operated until this finishes, so wait for about 20-30 seconds before pressing control buttons.
Keep buttons pressed for about a second, they will sometimes not respond to very brief clicking.
There are three main areas: FEC Power Supplies, Bias Power Supplies, and Cooling and Dry Air System. The first two are both Control and Monitoring areas, the last one is Monitoring only.
This zone contains the controls that allow turning ON and OFF the FEC power supplies, and arrays of rectangular lights that indicate their status.
When all power supplies are off, this is what it looks like:
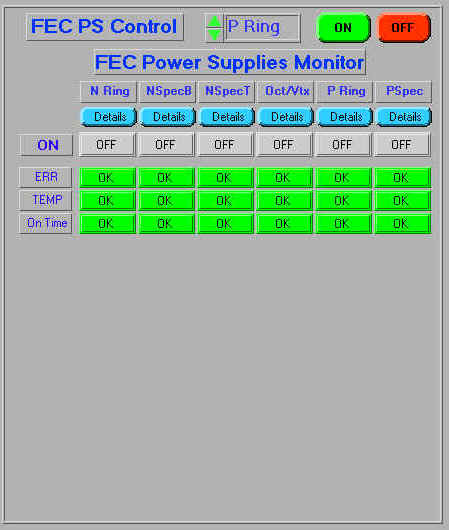
The visible parameters is this situation are only the status (ON/OFF), error flags from the power supplies (ERR: OK/NOT OK), the temperature at the power supply (TEMP: OK, NOT OK), and the communication status (On Time: OK/NOT OK), which will be OK if the last readout took place less than a minute ago. This last one is sometimes NOT OK for a few seconds while the computer is busy reading out other parts of the system.
Select which power supply to control, using the menu. One of the options is "ALL", for operating all power supplies at once.

Turn ON or OFF, pressing the respective button.
After a few seconds the status light of the power supply will change to indicate the new status.
The indicators will show if the voltages, currents and fan speeds are within range, for each power supply that is ON.
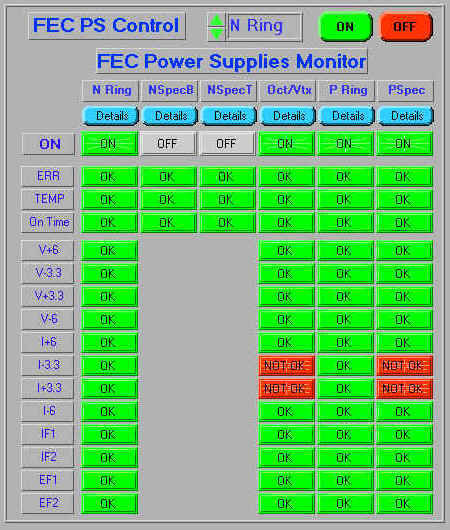
To get full information about the power supply parameters, click the "Details" button under the power supply name. This window will pop-up:
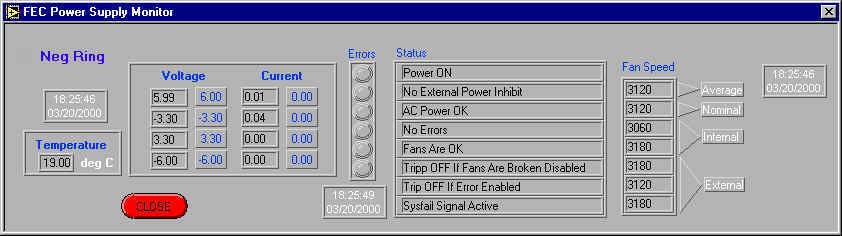
In this window you can see the voltage and current values, the fans speeds, the temperature of the power supply, status messages, and time stamps indicating when the last values were taken.
The Bias Power Supplies area is similar to the previous one, but it contains all the voltage and current information in the main window, instead of a separate details window. The GPIB indicator lights monitor the status of the communication with each power supply.
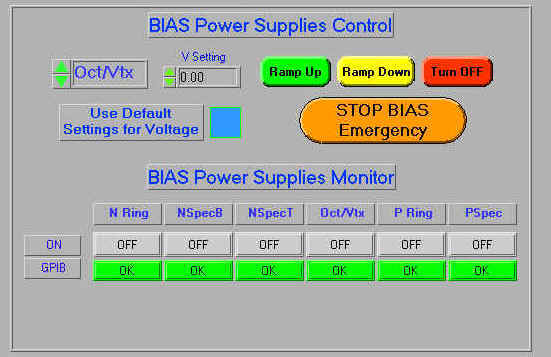
Select which power supply to control, using the menu.
For expert use, set the desired voltage. Otherwise, check the "Use Default Settings for Voltage" box, and the appropriate value for each power supply will be automatically used.
Press the green Ramp Up button. There is a confirmation window that allows the ramping up to be cancelled if there is a mistake in the selection of voltage or power supply. Also, if the FEC voltages are off or out of range, Ramp Up will automatically be cancelled.
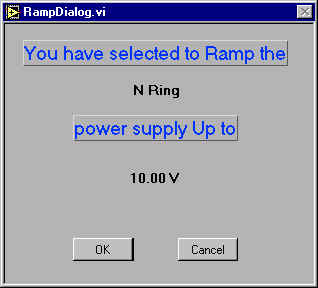
After pressing OK on the confirmation window, you should see a small window that displays the voltage and current during the ramp up steps.
The Ramp Up procedure works only if the power supply is OFF or at 0 volts. To change the voltage, Ramp Down first, and then Ramp Up to new voltage.
Select the power supply.
Press the yellow Ramp Down button. This will bring the power supply to 0 volts, but will leave it on. It should be used when the voltage will be ramped up again soon, or to a new value.
Select the power supply.
Press the red Turn Off button. The selected power supply will be ramped down to 0 volts and then turned off.
Press orange STOP BIAS button. This will cut off the voltage immediately, without ramping down, and should only be used for emergency situations.
The Cooling and Dry Air Systems Monitor consists of three groups of indicators, two for the cooling system and the third for the Dry Air System, that give the current status of the systems when they are in operation. For information about each of the monitored variables, press the blue Details button, and the following window will open:
When any of the UPSs go on battery power, there will be an indicator on the lower left part of the screen, which will display the battery minutes remaining for each UPS.